
My Straw Bale Gardening Experiment [With Photos!]
Welcome! This article contains affiliate links, meaning I get a commission if you decide to make a purchase through my links, at no extra cost to you.
Straw bale gardening – is there a gardening method that sounds easier? Straw bale gardening is a great way to avoid the most common problems people have when gardening – plus, it’s simple! All you need to do is buy a straw bale, place it in a sunny position, spend ten days conditioning it with water and fertilizer, pick your plants, and start gardening!
So, let’s talk about straw bale gardening, what it is, and how to do it right!
I’ll walk you through the straw bale conditioning process, give you a handy straw bale gardening conditioning chart, and tell you about the best plants and fertilizers for these incredible gardens. I’ll also tell you about some common problems with straw bale gardens and talk about the book that helped me learn about it!
Why Straw Bale Gardening?

I live in a bus on my son’s property in a tropical climate, surrounded by cane fields.
It’s a true garden paradise, except there are a few challenges in the garden I have to deal with:
- High temperatures cause rapid evaporation of water in the soil.
- Insects want to eat all of my vegetable seedlings.
- Being an old grandmother, I can’t and don’t want to dig and prepare a veggie patch from scratch, and the soil is way too dry anyway.
- Animals dig up new plants each night (bandicoots!).
- Constantly needing to apply mulching materials to protect plants and soil from the very hot sun. All my gardens are full of mulch, not always my favorite look.
However, not long ago, I came across Joel Karsten’s book, Straw Bale Gardens Complete. I actually wrote a review on it (you can find it below!) as it made a big impression on me.
It is a breakthrough vegetable gardening method, and this book had a lot of information on gardening in small spaces, growing vegetables organically, and saving water.
According to the book, gardening in straw bales could solve almost all of my gardening problems. So, naturally, I just had to give it a shot!
What Is Straw Bale Gardening?
Straw bale gardening is a method in which you plant seedlings or mature plants in a fertilized, conditioned bale of straw. As the straw bale naturally decomposes, it provides nutrients for the plants, and the glossy, fibrous straw retains moisture better than mulch or soil.
A straw bale garden is a bit like a raised garden bed, but the garden bed is a bale of straw that you don’t even need to add soil to.
Straw bale gardening is a radical idea for the following reasons:
- It takes 75% less time.
- Straw bale gardens use less water.
- They involve less bending over to maintain your plants.
- Straw bale gardens don’t have many problems with pests and require fewer pesticides.
- They don’t require weeding.
- Straw bale gardening can be done anywhere on a shoestring budget – you can even do it on a rooftop.
- Straw bale gardens are low-maintenance.
So, by planting your garden in a straw bale, you can avoid most of the common problems that come with gardening.
Where To Put the Straw Bale?
My first consideration was where to place my straw bale garden. I wanted partial shade, close to my house, and conveniently placed so I can keep a close eye on progress, yet keeping in mind that it is a “bale of straw” in my garden.
My son, who knows quite a bit about gardening and had his own plant nursery, was skeptical about growing plants in a bale of straw. He suggested I could never keep enough moisture in a bale above-ground.
Note from editor: The ‘son’ is Dan – you can read about Dan on our About page!
He has not read the book Straw Bale Gardens Complete, but…..
Sandy stated in Joel’s book:
“Hi Joel, I’ve been doing small straw bale gardens for my tomatoes, peppers, and squash since 2008 and the bales have worked great. For the last couple of summers, when we had drought…. The bales stayed moist and required very little water. I watered weekly using a gallon of water (that’s about half a bucket) per bale during that time.
I can’t say enough good about the process, it’s so easy and practically takes care of itself. Thanks for the info on Straw Bale Gardening.”
So, he grudgingly placed my bale near a tree for partial shade and some afternoon sun.
What Kind of Fertilizers To Use in Straw Bale Gardening
After finding the perfect place for your straw bale, you’ll need a decent soluble fertilizer to condition it.
The best kind of fertilizers for straw bale gardening are all-purpose soluble fertilizers like JR Peter’s Jack’s Classic Fertilizer or Organic Plant Magic. Your fertilizer must contain potassium and phosphorus because these minerals penetrate the bale’s root zone.
The kind of fertilizer you choose is very important for straw bale gardening, so be sure to choose wisely.
Opting for an all-purpose one will allow you the most flexibility when planting your garden, but just be sure it’s soluble.
Since you will use water to push the fertilizer deep into the straw, if you use a kind of fertilizer that’s not soluble for this gardening project, you might have some problems during the straw bale conditioning phase.
How to Condition a Straw Bale for Gardening
After we put it in place, I got straight to work conditioning my bale of sugar cane straw, and I’ll show you how to condition a straw bale for gardening with photos here (though I’ve made a straw bale gardening conditioning chart, which you can find after the pictures).
The straw bale conditioning process is to encourage the bale to begin composting internally so that it can support root growth.
I’m rather impatient, but Joel said: “It will take 10 days to get the fertilizer and water deep down inside so they can start to “cook.”
So, let’s go through the first 16 days of conditioning and planting a straw bale garden together and see what happens!
Conditioning My Straw Bale
Day 1

After you get your straw bale and fertilizer, it’s time to condition it:
- Thoroughly soak the bale with water.
- Pour on half a cup of all-purpose soluble fertilizer. I made up half a gallon in a bottle to use every second day. Alternatively, you can use 3 cups of any kind of soluble organic fertilizer in your straw bale garden.
- Notice that the bale is a cut-side up – this is important to let the water soak in properly.
Straw bales and hay bales have two distinctly different sides.
One side is the cut side. The cut side looks like the ends of the straw are aligned and have been sliced off with a knife.
The other side of the bale is the folded side and appears as if the straw stems have been folded over in the baling process. Make sure the cut side is face-up and the folded side is down. This will allow water to drip into the pieces of straw and circulate around the bottom all the way to the top again.
Also, ensure that the strings are around the sides of the bale and not on the top or bottom. The string is important for keeping the straw bale compressed since that extra pressure will help it to decompose quicker.
Day 2

As soon as the sun warmed up the water in the hose this morning (free warm water to kick-start the conditioning process!), I saturated the bale with water again. A finger test (poke your finger in to test the moisture) told me the straw bale garden was moist positive.
Joel states that no one likes a cold shower, and warm water stimulates bacteria to grow. That’s what I wanted, and quickly!
Day 3

Day 3 of how to condition a straw bale for gardening is fertilizer day again!
Pour half a cup of fertilizer and water in with some warm water from the sun-soaked garden hose to distribute those nutrients deep into the straw.
At this point, I was a little worried about my straw bale garden’s position. Joel mentioned that a straw garden must have 6 to 8 hours of full sun daily. However, my son said that we live in the tropics with temperatures over 35°C (95° F), and the plants would be better off in the partial shade.
I am following my son’s advice at the moment, leaving the bale near a tree. The straw bale gets partial shade with a few good hours of sun each day. My son grows his vegetables in a shade house, so there is possibly good reasoning behind his advice. Let’s see what happens.
Day 4

Day 4 of conditioning the straw bale garden is warm water only. Apply 1-2 gallons. The water should be running out of the bottom of the bale.
The good thing about straw bale gardening is that you can shift your bale to another place if you don’t like where it is. That’s exactly what I did on day 4. I moved it around the other side of the tree so it gets a few more hours of sun.
Try the finger test on day 4 (see image further up). Push your finger down into the bale to check the temperature and humidity. My bale is getting a bit of warmth inside, and the straw is starting to change color slightly – all good signs!
Conditioning the straw bale for gardening is going well, and the bale is starting to cook.
Day 5
We are now halfway through how to condition a straw bale for gardening. The whole conditioning process takes 10 days, after which we’re ready to plant.
Pour on a half a cup of fertilizer again, and wash it down with warm water. The straw bale should be feeling a bit warmer today.
Day 6

Day 6 is another water-only day. Apply some warm water.
Some people set up water sprinklers in their straw bale garden but I like to water them manually. I like to see what’s happening, and I‘m never in a hurry these days.
The bale is slightly warm today. Fingers crossed it starts to cook better tomorrow!
On day 6, I also have my plants ready. I bought some parsley, basil, tomato, and capsicum (red pepper) plants. I’m keeping them in a shady place until day 11.
My choice of plants will be OK, although companion planting rules mention not to plant parsley and tomatoes too close together.
Day 7
On day 7, we apply ¼ cup of fertilizer and warm water to the bale.
At this stage, I am, once again, worried that my bale is not getting hot enough. I’ve shifted the straw bale garden again, moving out from the shade of the tree into the full morning sunlight. (I think that Joel was right all along, sorry Dan!)
That’s the best part of this garden – you can reposition it anytime with a hand truck.
Today, I see 2 tiny sprouts of weeds on top of my bale. Life-sustaining signs, I guess….
Day 8
On day eight, apply ¼ cup of fertilizer and a small amount of warm water again.
My bale feels quite wet today. It is also quite heavy and smells a bit musty. I was a bit worried that there was a problem with my straw bale garden at this point, but I just left it and I’m glad I did!
Day 9

On day nine, apply ¼ cup of fertilizer and a small amount of warm water.
I turned my straw bale upside down today as it seemed too wet on the bottom. I may have been too generous with the water these last few days. You only really need enough water to wash in the fertilizer.
Day 10
On day 10, we need to apply one cup of soluble fertilizer.
I used a small amount of warm water to wash the fertilizer into the bale.
My bale smells sweet at last! Well, “compost sweet.” Using the finger test, it definitely feels warm to hot inside my bale. I can feel that my strawbale is “cooking!“
Our conditioned straw bale garden is almost ready to plant, two more days and it will be ready to go.
Day 11
Day eleven is our rest day. We don’t do anything to condition the straw bale for gardening today.
Today is a good day to check for worms in the straw bale. I checked my bale, but so far haven’t spotted any. Worms are great in the garden as they help break down complex organic material back into food that can easily be taken up by the plants’ roots.
I hope that the worms, insects, and bacteria have all been at work eating, digesting, and decomposing organic matter inside my straw bale garden. Go hard little critters! I appreciate you.
Day 12

Finally, it’s planting day! How to condition a straw bale for gardening is now done, and we’re onto the next stage.
My straw bale garden was moist and warm, and some obvious decomposition is happening. It is slightly brownish with tiny, black flecks everywhere, which are the first sign of straw decomposing to make soil.
The straw bale won’t look much different outside, but bacteria have begun digesting the straw and giving back nitrogen.
I carefully removed the basil, tomato, parsley, and pepper plants from their trays to not disturb their small fragile roots, parted the straw with my hands, and placed each seedling well down into the moist bale. Squeeze the straw around each plant and press down firmly.

Unfortunately, the parsley seedlings looked a bit wilted and yellow. I think I left them sitting in water in my garden shed for too long. I planted them anyway, so hopefully, they will recover in the sunlight.
Don’t forget to water all the seedlings lightly with warm water.
Day 13
We had a cold night but all seedlings look very good. The parsley even looks better this morning. I also pushed in some bamboo stakes beside the tomato plants for support.
Day 14
One parsley plant made it to today, but unfortunately, the others didn’t survive. The rest of the plants look strong and healthy.
I moved my straw bale back into the semi-shade to its final resting place. It will still receive a few hours of the full morning sun, but our temperatures are starting to climb and I feel will be too hot for most of the plants in full sun all day.
Day 15 and 16

We’ve had very high temperatures during the last two days. The plants remained strong and did not wilt like the lettuce plants in the garden did. I am impressed with how my straw bale garden retains moisture and sustains my seedlings.
The straw bale garden should retain moisture better than normal soil, so it will need less watering, no weeding, no bending, and no digging. Still, I will monitor how it goes and water regularly.
Joel suggests a bit over a gallon of water per week in moderate climates, but you should add some water on the first sign of wilt.
I will plant some petunias around the sides of the bale to make it look nice and as a wilt test. If I see any part of the petunias wilt, I’ll know that water is required immediately.
Straw Bale Gardening Conditioning Chart
If you’re ready to try straw bale gardening, you might want a handy guide or chart to help you ensure that you time each conditioning step properly. Measuring and following through on all of the daily maintenance of your straw bale garden will really pay off – especially since they’re so low maintenance after you set them up.
So, if you want a simple straw bale gardening conditioning chart, here you go:

Straw Bale Gardening: Does It Work?
Straw bale gardening works! Although conditioning and setting up your garden takes around 12 days, once you have it set up, the garden “bed” is very low-maintenance, excellent for deterring pests, and retains water well, even in dry, hot conditions.
So, have a go at making your own straw bale garden! It’s been a great experiment and I’ve thoroughly enjoyed the process, but most importantly, my plants seem to enjoy it!
I’m now a straw bale garden convert, and I can’t wait to start my next one!
Straw Bale Gardening Problems
Although I love straw bale gardening, over time, I encountered some minor problems with my straw bale “garden bed.” While they weren’t bad enough to turn me off from using them, it might help to be prepared for some potential setbacks:
- Straw bales don’t last forever. While your decomposing straw bale provides nutrients for your plants, it’s still decomposing. Straw bale gardens usually last no more than two years, but you might need to replace yours every year, especially if you live in a humid climate.
- Straw bales aren’t as stable as soil. Growing larger plants in a straw bale garden can be a problem since you don’t have that much room to stake them up. For example, top-heavy tomatoes need plenty of support, but if you’ve already added other plants to your bale, finding the real estate for a tomato change might take trial and error.
- You might need help moving the bale. While this straw bale gardening problem isn’t a dealbreaker, just know that straw bales can be heavy. You might need a hand or a hand truck. like this one when setting up.
- The bale can become unsightly. Over time, your straw bale will look slightly less pretty than when you brought it home. While this might not be a problem for everyone, if you are looking for aesthetics, you might want to improve your straw bale garden. For example, adding trailing, flowering vines will cover up that decomposing bale, but you’ll have to plant the flowers to reap the benefits.
Although I tried to come up with more potential problems you might have with straw bale gardening, that’s really about it! It’s hard to find a gardening technique with so few disadvantages, which is why I’m a true believer in them.
Best Plants for Straw Bale Gardening
It’s important that your vegetable seedlings are happy with growing close together, so it’s worth considering companion planting while you’re planning your garden.
As the Farmer’s Almanac states: tomatoes and basil were made to go together, not only in sauces but in the garden too. Basil is a good friend to peppers too. Check out their handy reference:

Mother Earth News also offers an in-depth companion planting guide, with nearly every variety of vegetable and herb known to man. It certainly makes gardening a lot of fun when you think about planting different types of plants that actually like each other.
Straw Bale Gardens Complete Book Review
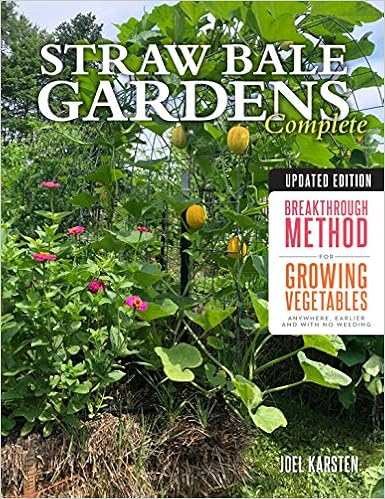
While browsing in the library last week, in the backyard category, I came across this book, Straw Bale Gardens Complete, by Joel Karsten. The cover had lush, healthy cabbages, beans, and pumpkins growing in a bale of straw.
This book grabbed my attention as it claimed to solve some of my garden problems, and I love the idea of growing organic vegetables.
I liked Joel’s trial and error attitude, writing the book from his experiences. I’ve also heard the same comments as Joel:
- Straw bale gardens will never work
- Why would you even try them
- They won’t retain enough water,
- Etc., etc., etc.
But I was encouraged by Joel’s words:
“Set aside the scepticism and try it for yourself.”
What’s Inside Straw Bale Gardens Complete
All the set-up, water solutions, fertilizer, trellis-making, and bale-making instructions are outlined clearly and in detail in this book with great photos to help and show you how to do things.
Joel has a whole chapter for straw bale gardening in small urban and unusual spaces, like asphalt, the corner of a carpark, and on top of a pile of pallets.
It includes all the details and things to be careful about, for example, placing a rubber mat, or similar, under your bale before placing your bale directly on your deck. Putting bales on your deck may not be good for the stain or paint.
For a gardener who needs a portable garden to move during the year, you can use an old shopping trolley. I love this idea and will keep my eye out for one! Plant some flowers on the side of your bale if your neighbors think you are getting a goat…
Read More – 17 Weird Garden Veggies You Have To See To Believe!
The Best Straw
The book includes chapters about straw, the best straw to use, what kind of straw to use, how to obtain straw bales, what kind of fertilizer to use, and where to place the straw bale garden for the best results.
On pages 48 and 49, I learned some very important points that I had already done incorrectly, being in much haste to get started. I grew up on a farm and every summer helped dad with baling the hay for winter feed for the sheep and cattle.
However, until I read this book, I never realized that:
“Straw bales have two distinctly different sides. One side is the cut side and it looks like the ends of the straw are aligned and have been sliced off with a knife. The other side of the bale is the folded side and appears as if the straw stems have been folded over in the baling process.”
Joel says: “It is ideal to orient the bale cut-side up because this allows much easier penetration of water and fertilizer into the bale during the conditioning process.”
Also, just as important: “The strings on the straw bale should be around the sides of the bale and not on the top and bottom surfaces of the bale. Strings hold the bale compressed which is essential to its quick decomposition.”
How to ‘Cook’ the Bales
My favorite chapter in the book is the conditioning chapter on page 87.
It gets into the practical stuff and how to get the bales into the “cooking” process. Because straw bale conditioning takes 10 days, this chapter explains how to prepare the straw bale daily, why each step is important, and how to tell if it is working.
There is also a chapter about organic straw bale gardening for the purest organic garden, and it covers things like what kinds of fertilizer to use during conditioning for growing organic produce.
But, being an action girl, I want to now get onto the planting seeds and seedlings chapter.
My Favorite Planting Tips From The Book

Plant a Skirt of Flowers
This chapter contains vital information on straw bale temperature, how to plant seeds and seedlings, etc., but I really loved his paragraph on page 110, referring to his mom’s idea of planting a skirt of annual flowers into the sides of the bale to pretty up the decomposing bales of straw in plain sight.
Joel suggested planting impatiens, petunias, marigolds, or salvia, with the added advantage that if the flowers look wilted, it’s time for more water for the veggies. Great idea, mom!
Help Cut Flowers Last Longer
I couldn’t resist including another great tip from page 111 in this review, something very dear to my heart – helping cut flowers last longer in the vase.
He suggests re-cutting the stems under warm water, then adding the following mixture to every vase from now on:
- 1 cup of 7UP or Sprite.
- 3/4 teaspoon household bleach
- 1 cup of hot water
Re-cut, change the water, and add this mix every 3 days. Your beautiful flowers will last so much longer.
There is a lot more information in this book about greenhouses, pesticides, water solutions, and of course, harvesting.
Keep Your Bale Busy
On page 137, Joel talks about keeping your straw bale garden busy and planting in rotation so that no surface area on your bale is left idle. He suggests harvesting something every day. Many vegetables will be ready in 30 days. Eat them as soon as possible – within hours, if you can.
Freeze Your Basil
He includes a great tip for freezing excess basil, as well. Cut up your basil with scissors. Put the cut basil in ice-block trays and cover with olive oil. Freeze your basil-oil blocks and store them for winter. This is a winner as I love this herb in much of my cooking.
Read More – How to Harvest Basil And Keep It Growing
Use Beer Traps To Keep Slugs Out of Your Straw Bale Garden
Joel has a small “tip” square on some pages, the voice of experience speaking. I like the one on page 92:
“Use a few baby food jars half full of beer to trap slugs in your straw bale garden. Bury the jar about half way in the surface of the bale, and you’ll see it will attract dozens of slugs before the beer evaporates in a few days.”
I’m going to try that, my son won’t notice one can going missing…
Golden Compost
Joel completes his book by discussing the kind of fertilizer left from straw bale gardening after the harvest is complete, which he calls “gold” compost. Then, he gives a very comprehensive plant profile and how to eat each plant – the most important thing, of course!
Why You Should Get a Copy of Straw Bale Gardens Complete By Joel Karsten
I believe this is a book you would refer to many times. It’s clear, simple, readable, doable, fun, and has lovely illustrations. Plus it has tons of tips that aren’t exclusively about straw bale gardening that you can use to make the most out of your harvest.
If you want to grab a copy, the book is available on Amazon in e-book and paperback:
Final Thoughts
Learning how to garden using straw bales has been a game-changer for me, and I plan to do it a lot more often.
So, now that you know about the best plants, the kind of fertilizer to use, and how to condition straw for straw bale gardening, I encourage you to grab a copy of Straw Bale Gardens Complete and give it a try! It’s a sustainable way to have a full-fledged, water-retentive, pest-resistant garden in a small space.
More Creative Gardening Ideas:
- How to Speed Up Compost [16 Ways to Make Compost Fast!]
- How to Attract Bees to Your Garden [Complete Guide]
- 8 Best Mulch Alternatives for a Beautiful Garden
- 5 Gallon Bucket Garden DIY [+ 30 Most Productive Vegetables to Grow In Buckets!]
- How To Improve Garden Soil Over The Winter


I’ve just brought my bales home and am looking for a good fertilizer. I’m not familiar with fertilizers so wondered if you know if miracle grow will be sufficient?
Hi Karen! Great question. Miracle Grow will work, but we rarely recommend it. There are plenty of other better fertilizers out there that are cheaper and more effective. Compost from a compost pile, worm tea, and fish emulsion fertilizers are all-natural and do just as good of a job (if not a better one) than Miracle grow. Plus, they’re all slow-release options just like Miracle Grow.
Thanks for asking! 🙂 I hope that helps! Sending you all the best,
Aimee
I like gardening but I don’t have much space in my place. I love that straw bale gardening is a breakthrough vegetable gardening method for small spaces. Thank you for all the pictures, it really shows how easy the conditioning process is. I will definitely start by soaking the bale in water and an all-purpose soluble fertilizer. I will look forward to purchasing the straw bale to kickstart my vegetable gardening.
Thanks for the comment Hazel, it certainly is a great method for small spaces. Although not without challenges, you can definitely make strawbale gardening work for you!
I learned new information from your article, you are doing a great job.
King regards,
Thomassen
Thanks Thomassen!
Great article. I am doing eight straw bales for my gardening this year. My two kiddos are really enjoying it as well. My straw bales are on day three of conditioning. I will be setting up drip irrigation watering system for them this coming weekend. Ready for day twelve to get here so I we can start planting. Look forward to reading about your success with straw bale gardening.
Wow, eight, that’s great! It’s a really fun thing to do with kids, mine loved it too 🙂 Drip irrigation is a really good idea, we didn’t put any irrigation on our strawbales, but I think a slower, drip-style irrigation would have made it a lot better. We just hosed it every few days but you don’t get it as nicely saturated. I hope your bales work out really great for you! Elle
Thank you so much. At last, I discovered an article which I am looking for quite a
long time. I hope that it will help me.
Best regards,
Balle Raahauge
Hi Balle, thanks for the comment! I’d love to hear about your strawbale gardening experience, what did you think of it?