The Ultimate Guide To Growing Amaranth From Seed, Cutting, Or Transplant!
Welcome! This article contains affiliate links, meaning I get a commission if you decide to make a purchase through my links, at no extra cost to you.
If you’re looking for the ultimate homesteading crop that delivers double duty in the garden, amaranth deserves a spot at the top of your list. This ancient powerhouse gives you a delicious grain that can replace rice, quinoa, or oats in your pantry. It also offers tender, nutrient-packed greens that outperform spinach during the heat of summer. Amaranth also has a ton of other bonuses we’ll reveal in this article.
Sound good?
Then let’s grow some epic amaranth plants!
How To Sow Amaranth Seeds In 5 Easy Steps
The most challenging part of sowing amaranth is that the seeds are tiny. But if you follow these five steps, sowing is way easier.
1. Wait For Real Heat
The trick to sowing amaranth is waiting for the warm weather. When your garden soil reaches 65 to 70 degrees Fahrenheit, you’re in the go zone! May or June works best.
2. Pick A Sunny And Lean Spot
Choose a spot that gets full sun. Also, remember that amaranth is very rugged. It actually produces better grain if the soil is lean. So, you don’t need fancy fertilizers. Rich soil can lead to massive leaves with weak, floppy stems! So, clear out the weeds. Rake it so it’s smooth. And let the soil be.
3. The Sand Trick
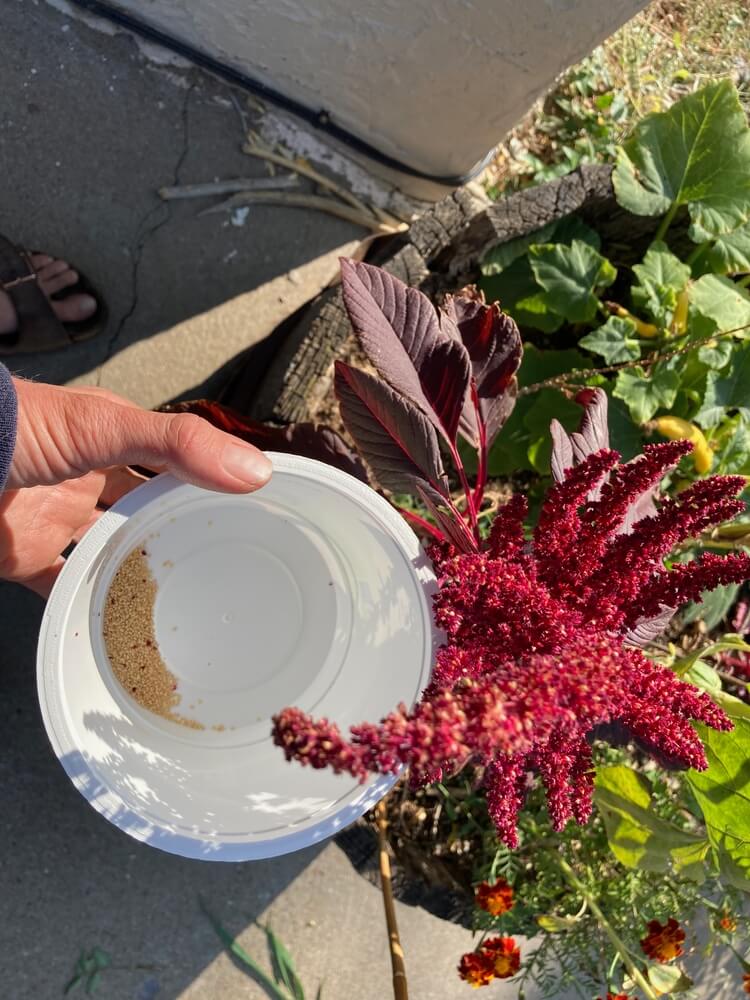
If you have ever handled amaranth seeds, you know they are impossibly small. They look like specks of dust. It is very easy to dump an entire packet into one square foot accidentally. To avoid this, mix your seeds into a cup of dry sand. This old gardener’s trick dilutes the seed density. That way, you can cast them evenly across the row rather than in a single pile or clump.
4. Sow On The Surface
Amaranth seeds need sunlight to trigger germination. Burying them deep will prevent them from sprouting. Lightly scatter your sand-and-seed mix over the prepared bed. Afterward, walk over the area or press down gently with the back of a hoe to ensure good soil contact. If you feel you must cover them, use barely a dusting of fine soil.
5. Water Gently And Eat Your Thinnings
Use a fine mist to water the bed so you avoid washing the tiny seeds away. Keep the surface moist, and you should see sprouts popping up within two weeks. Once they are a few inches tall, you will likely need to thin them out to give the survivors room to grow. Don’t throw those thinnings away. They make delicious, earthy microgreens for tonight’s salad.
Read More – The Ultimate Guide to Growing Snake Plants From Seed, Cuttings, or Transplant!
How To Clone Amaranth From Cuttings (The 5-Minute Shortcut)
Amaranth cuttings are your secret weapon if you want to “clone” the properties from an existing plant that you like. It’s also a sneaky shortcut. No more waiting for seeds to germinate.
1. The Cut
Select a healthy green amaranth stem that isn’t woody. Carefully cut a 4 to 6-inch segment right below a leaf node. (The bump where leaves emerge). Cut the amaranth at a 45-degree angle! Doing so helps maximize the rooting surface area.
2. The Strip
Remove all amaranth leaves from the bottom 50% of the stem. You want a bare stalk to submerge. But keep 2 to 3 sets of leaves at the top to power growth.
3. The Soak
Place your trimmed stems in a glass of water on a sunny windowsill. Ensure the stripped nodes are submerged, but the leaves stay dry. Change the water every two days to keep it fresh and oxygenated.
4. The Plant
After 1 to 2 weeks, white roots will emerge. Once the roots are an inch long, transplant your new clone into moist soil. Keep it well-watered for the first week to help it transition from water to dirt.
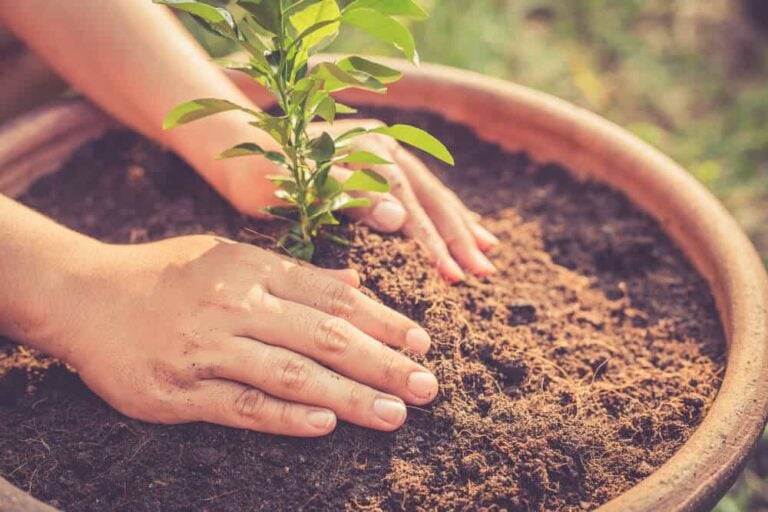
The “Peat Pot” Rule For Transplants
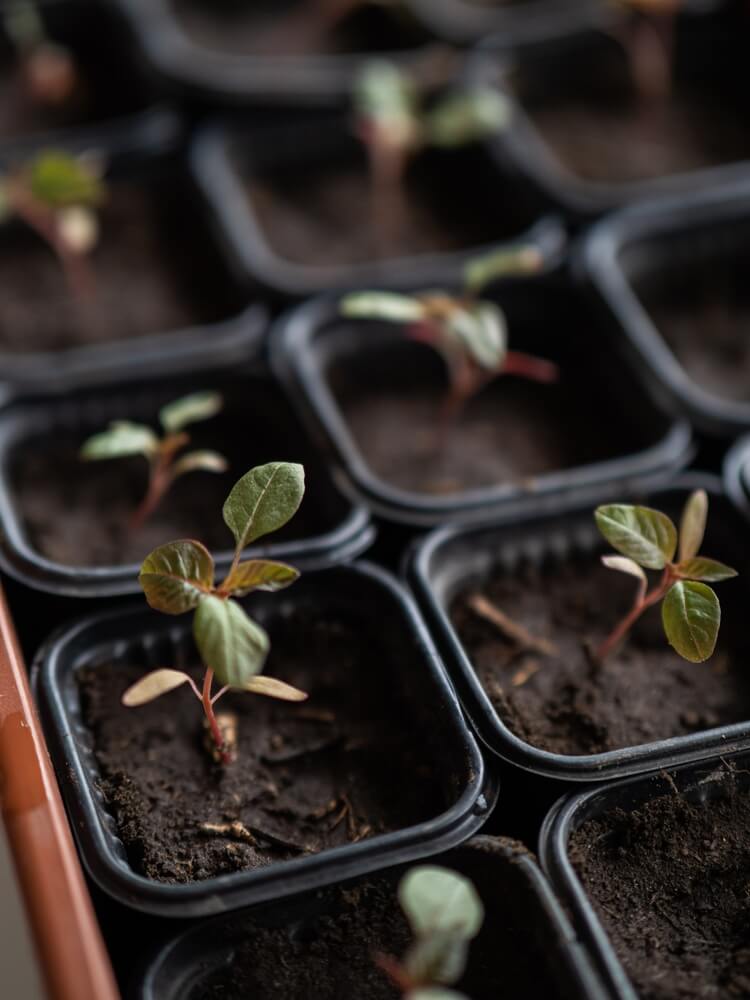
Since amaranth seedlings grow incredibly fast, you will rarely find them at local nurseries. If you want a head start, grow your own transplants. But only use biodegradable peat cups. Amaranth has a sensitive taproot that hates being disturbed! So, planting the entire decomposing pot directly into the garden ensures your seedlings never suffer transplant shock.
Read More – How To Grow Hedge Apple Trees (Osage Oranges) From Seeds Or Transplants!
Amaranth Requirements – The Ultimate Cheat Sheet
The beautiful thing about amaranth is that it’s low-maintenance once established. But understanding its preferences will take your harvest from “okay” to spectacular.
Sunlight
Amaranth is a full-sun fanatic. We’re talking 6 to 8 hours of direct sunlight per day, minimum. But it gladly accepts 12 hours if you’ve got it. This plant evolved in the blazing sun of Central and South America. It still craves those intense rays.
In full sun, amaranth develops strong stems and vibrant leaf colors and produces abundantly, whether you’re growing it for greens or grain. The flower plumes on ornamental varieties will be bigger and more dramatic. The seed heads will be fuller and heavier.
Climate
Amaranth thrives in heat and laughs at conditions that make other crops struggle. It’s genuinely drought-tolerant once established, handles humidity beautifully, and can produce in areas where summer temperatures regularly hit 95 to 100°F. In fact, those are the conditions where it really shines.
Amaranth grows best when daytime temperatures are between 75 to 85°F. But it’s remarkably tolerant of heat waves. I’ve seen it thriving in 100°F+ weather while tomatoes next to it were wilting or dying. However, it’s extremely cold-sensitive. Even a light frost will kill it outright. And growth slows dramatically when nighttime temperatures dip below 50°F.
Growing Zones
Amaranth is an annual that thrives in growing zones 3 to 11. That spread covers most of North America. In tropical zones (10 to 11), it can act as a short-lived perennial. (Especially if you’re taking cuttings.) Northern gardeners (Zones 3 to 5) need to wait until the soil is genuinely warm, usually late May or early June, before planting.
Soil + Fertilizer
Here’s where amaranth separates itself from the pickier crops in your garden. It’s the homesteader’s dream when it comes to soil requirements. It’s not fussy. It actually prefers conditions that stress other crops. No advanced fertilizer or soil amendment mixes required.
Amaranth will grow in almost any soil type. Clay, loam, or sandy soil all work as long as they drain reasonably well. It doesn’t need fluffy garden soil. In fact, some of the most vigorous amaranth I’ve seen was growing in compacted and clay-heavy soil. That said, loose, well-draining soil will give you faster germination and easier harvests if you’re pulling whole plants.
Watering
Amaranth has a well-deserved reputation for drought tolerance, but there’s nuance here that can make or break your success.
Keep the amaranth’s soil moist for the first one or two weeks after planting. The tiny seeds need moisture to germinate. Aim to check the soil every two to three days. If it feels dry, mist it. Continue keeping the garden soil moist as the seedlings emerge.
You don’t need to water as much once the amaranth reaches 6 to 8 inches tall. By then, it will have a solid root system and a deep taproot that mines water.
In many climates, natural rainfall is sufficient once plants establish. I typically water mature amaranth only during extended dry spells (2+ weeks without rain). Or, when I want maximum leaf production.
Read More – The 5-Step Hydrangea Pruning Protocol For Perfect Blooms Every Time!
Amaranth Growing Schedule – Month By Month

Here are the critical dates and tasks all amaranth growers should know. Since this is primarily an outdoor warm-season crop, the real action happens from late spring through fall.
April
Are you a Zone 6-7 or warmer gardener? Then start preparing your garden beds by adding compost and removing weeds. Northern gardeners (Zones 3 to 5) can start seeds indoors in biodegradable pots during the last two weeks of April, about 4 to 6 weeks before your last frost date. Don’t rush it. Amaranth won’t tolerate cold, so indoor starts are purely for getting a jump on the season.
May
May is prime planting time for most of the country. Wait until soil temperatures hit at least 65°F (ideally 70°F) before direct sowing, usually mid to late May in Zones 5 to 7. Southern gardeners (Zones 8 to 9) should have already planted in late April, and by May, your seedlings are up and ready for thinning.
June
Northern growers (Zones 3 to 4), this is your month to plant once the soil is finally warm. Everyone else should see rapid growth now as temperatures climb. This is when you establish your watering routine. Keep young plants consistently moist, but start transitioning to deep, less frequent watering as they reach 6 to 8 inches tall. Begin harvesting leaf amaranth varieties by pinching growing tips to encourage bushier growth.
July
Peak growing season for amaranth everywhere. Plants are shooting up fast in the summer heat while other crops sulk. You’ll see flower plumes forming on grain and ornamental varieties by mid to late July. Continue harvesting leaves from the top and sides. The plant will keep producing. If you want maximum seed production, stop heavy leaf harvesting now and let the plant focus energy on those developing flower heads.
August
Flowering is in full swing, and seed heads are maturing. For grain amaranth, watch those seed heads closely. When they start to dry, and the seeds rub off easily in your hand, it’s almost harvest time. You can take late-season stem cuttings now if you want to clone favorite plants for indoor growing through winter. Continue light leaf harvesting on varieties explicitly grown for greens.
September
September is harvest time for grain amaranth in most regions. Cut seed heads when about 75% of seeds are mature (they’ll feel hard when you bite one). Hang your amaranth upside down in a dry, well-ventilated space to finish drying, with a sheet underneath to catch falling seeds. In warmer zones (8 to 10), you can actually plant a fall crop in early September for late fall/winter greens. The first frost will kill amaranth, so northern growers should wrap up harvests by month’s end.
October Through Winter
In Zones 8 to 10, fall-planted amaranth can continue producing greens well into October and November. Everyone else, your amaranth is done once frost hits. Pull spent amaranth plants. Add them to the compost pile (they’re nutrient-rich and break down beautifully). If you saved seeds, store them in a cool, dry place in airtight containers. They’ll remain viable for 4 to 5 years.
Read More – 9 Reasons Why I Stopped Raking Leaves (And Why I Might Never Rake Again)
Choose Your Fighter – Leaf vs. Grain Amaranth
All amaranth plants are edible from the roots to the flowers. But most varieties either excel at producing leaves or grains. Knowing the difference helps you achieve the best possible harvest.
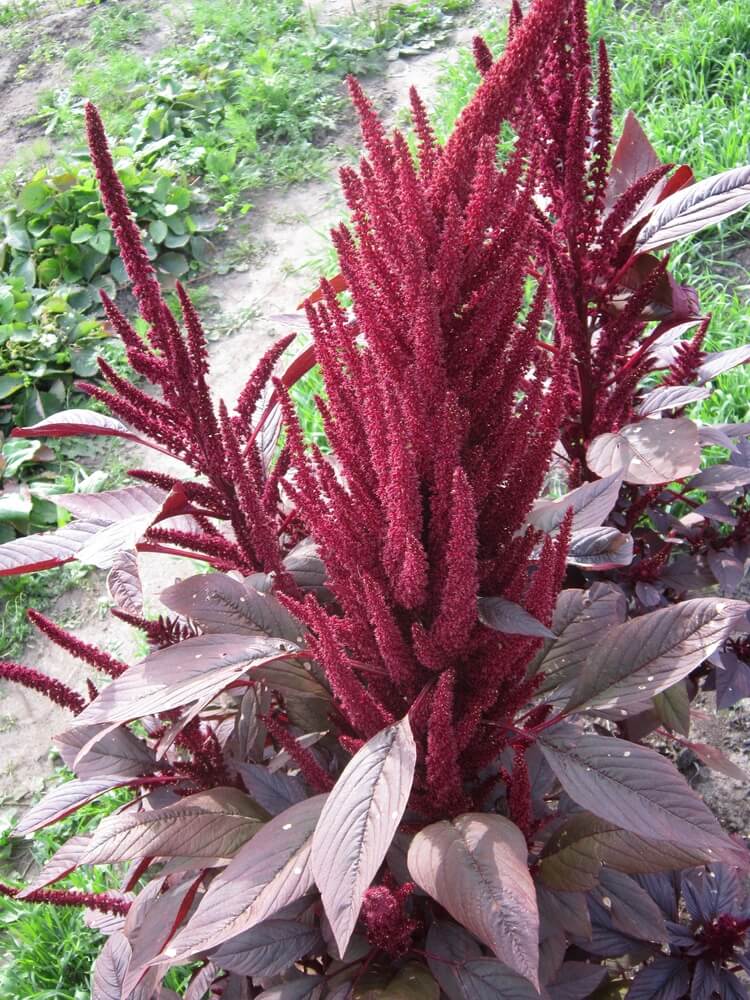
1. Grain Types (The Heavy Lifters)
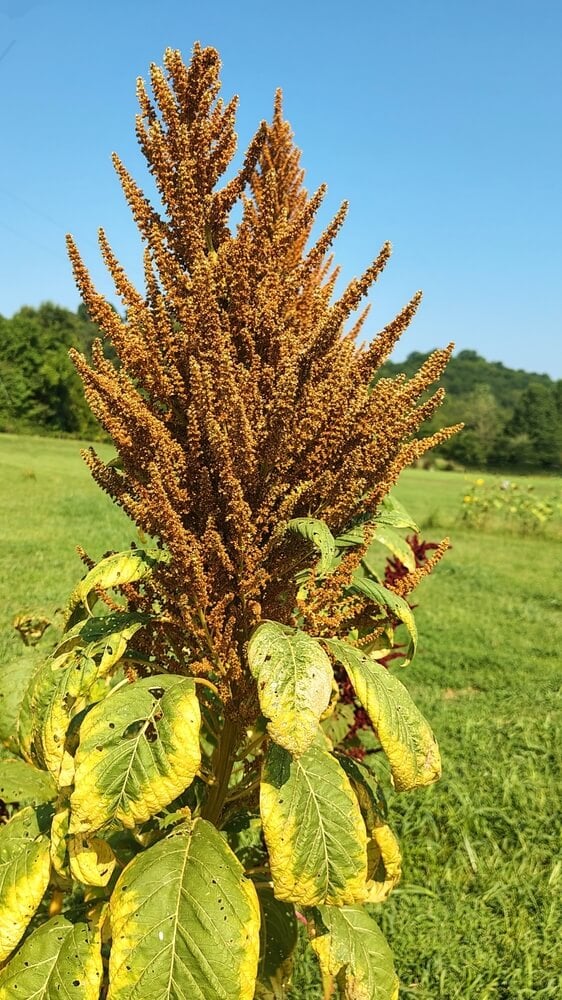
These are the giants of the garden. They often reach 5 to 8 feet tall. They are bred to produce massive flower heads packed with thousands of white or golden seeds.
- Best for: Popping grain, flour, and porridge.
- Look for: Amaranthus cruentus or Amaranthus hypochondriacus. Popular varieties include ‘Golden Giant’ and ‘Opopeo’.
Note: You can eat the leaves. But they aren’t as tender as the leaf types.
2. Leaf Types (The Salad Kings)
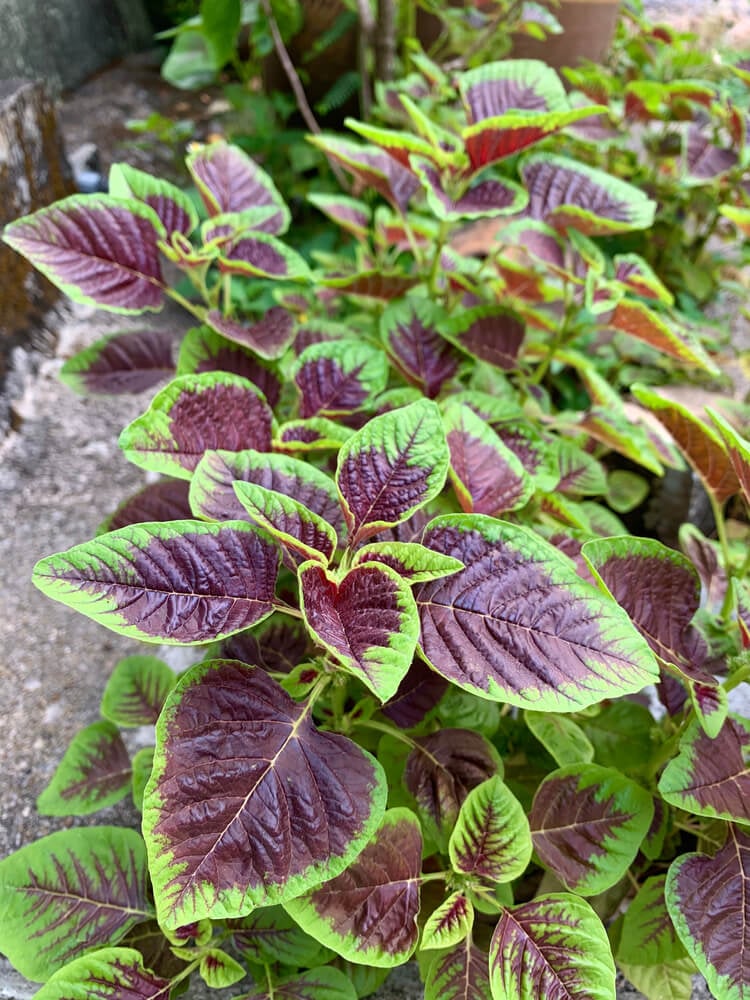
Leaf-type amaranth varieties are smaller (usually 2 to 4 feet tall) and bushier. They are bred for delicious, succulent, and tender leaves that taste like sweet spinach. They also resist bolting (flowering) longer than grain types.
- Best for: Salads, stir-fries, and soups.
- Look for: Amaranthus tricolor or Amaranthus dubius. Popular varieties include ‘Joseph’s Coat’ and ‘Callaloo’.
Note: They produce seeds. But the heads are smaller. And the seeds are often black, which can be gritty to eat.
Read More – 10 Permaculture Principles That Let Nature Do The Heavy Lifting For You!
The Three Best Ways To Eat Amaranth
The most remarkable thing about amaranth is that there are three very delicious ways to eat it.
1. The Leaf: “The Summer Spinach.”
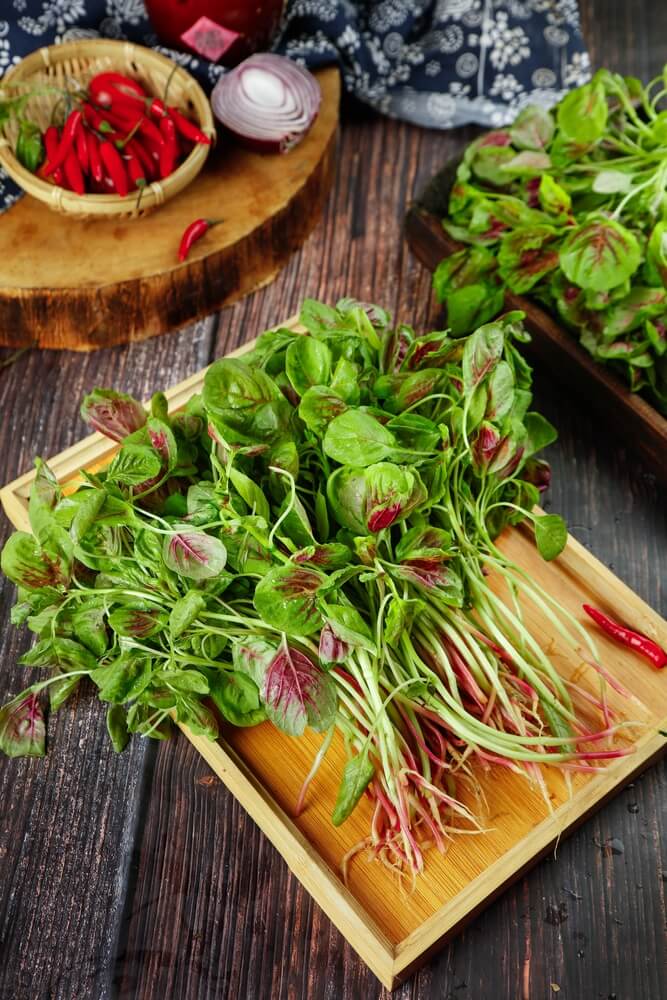
Before the plant ever produces a flower, it offers a bounty of nutritious greens. Amaranth leaves are a staple in Caribbean, African, and Asian cuisines.
They taste remarkably like a sweet, earthy spinach, but with one significant advantage. They don’t “bolt” or turn bitter in the summer heat. Your spinach throws a tantrum and goes to seed in June. But amaranth leaves are just hitting their stride!
Harvest the tender young leaves for delicious garden salads. You can also sauté the larger leaves with olive oil, garlic, onions, peppers, and maybe some pork or chicken.
2. The Grain: “The Ancient Superfood.”
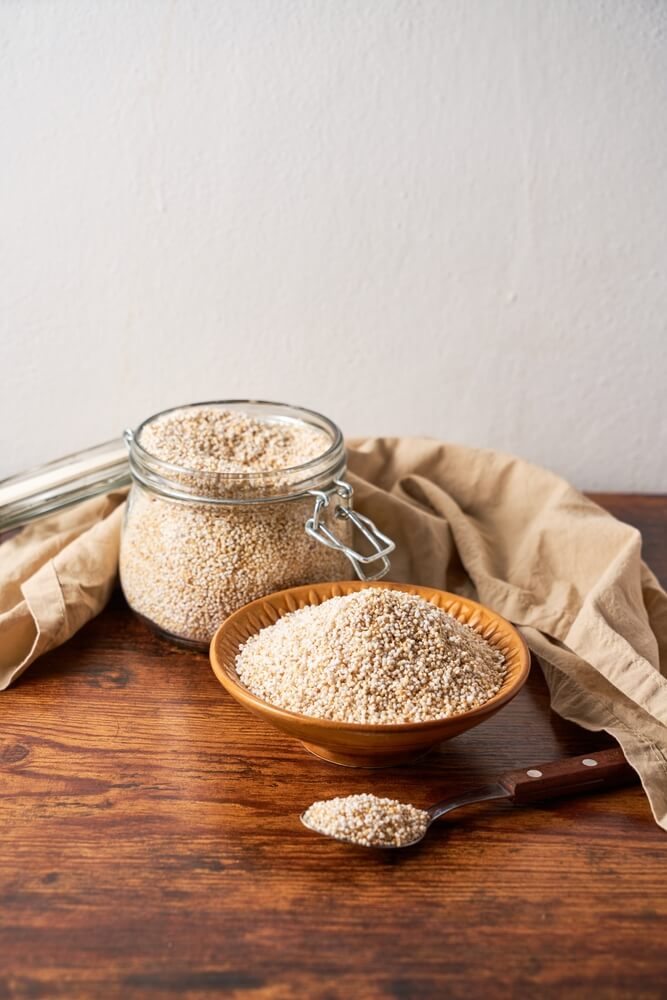
Amaranth plants produce fluffy, heavy seed heads. Those seed heads pack thousands of tiny gluten-free grains. You can harvest them, dry them, and then cook them. You can boil amaranth seeds and make a creamy porridge. Or, use them as a yummy quinoa alternative.
One of the most unique and fun ways to prepare the grain is to “pop” it. Just like popcorn, when the seeds hit a dry, hot skillet, they puff up into tiny, white, nutty-flavored “snowflakes.” These popped seeds can be eaten as a snack straight from the pan, sprinkled over yogurt or oatmeal for crunch, or mixed with honey to make traditional Mexican Alegría candies.
A single, well-tended amaranth plant can yield anywhere from a few ounces to a half-pound of grain in ideal conditions.
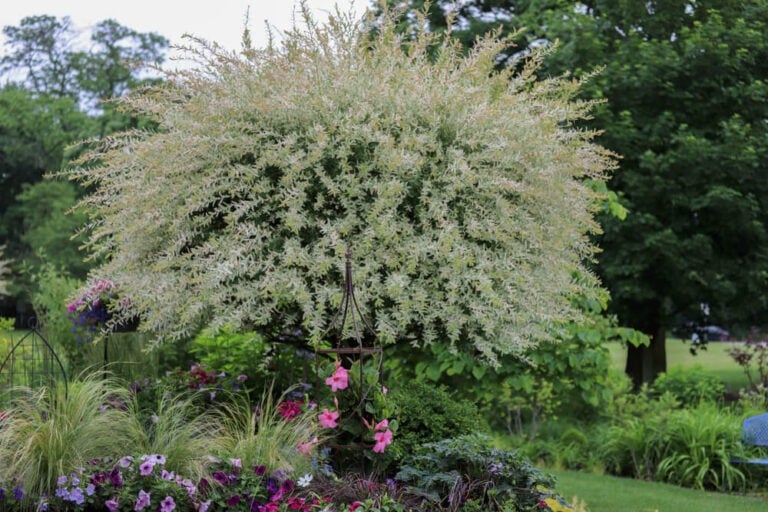
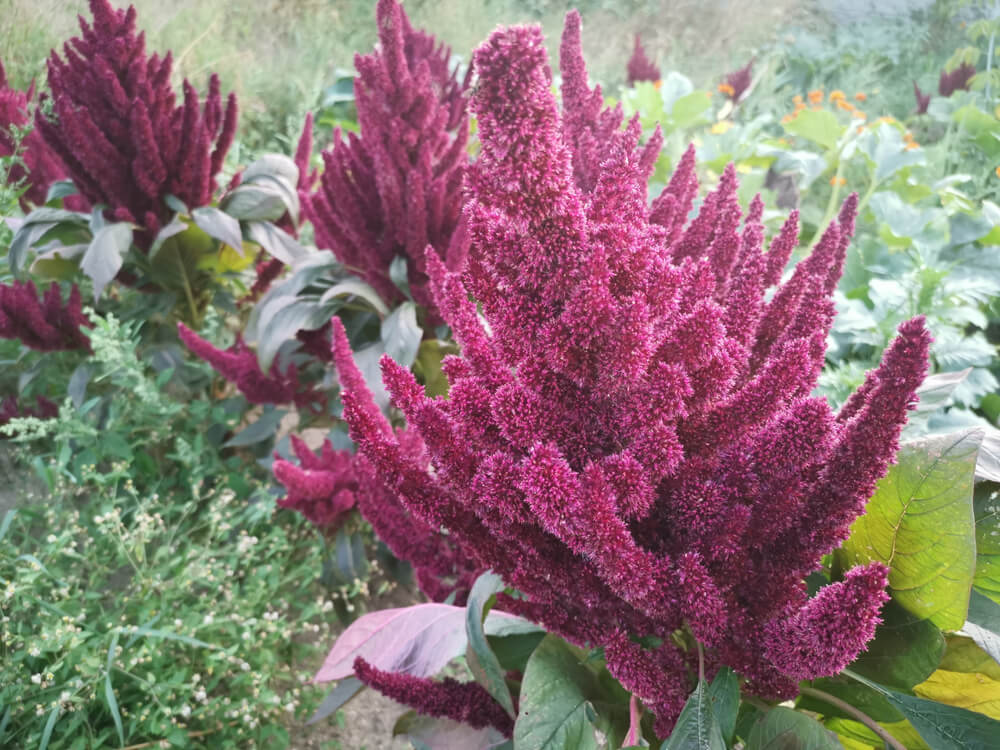
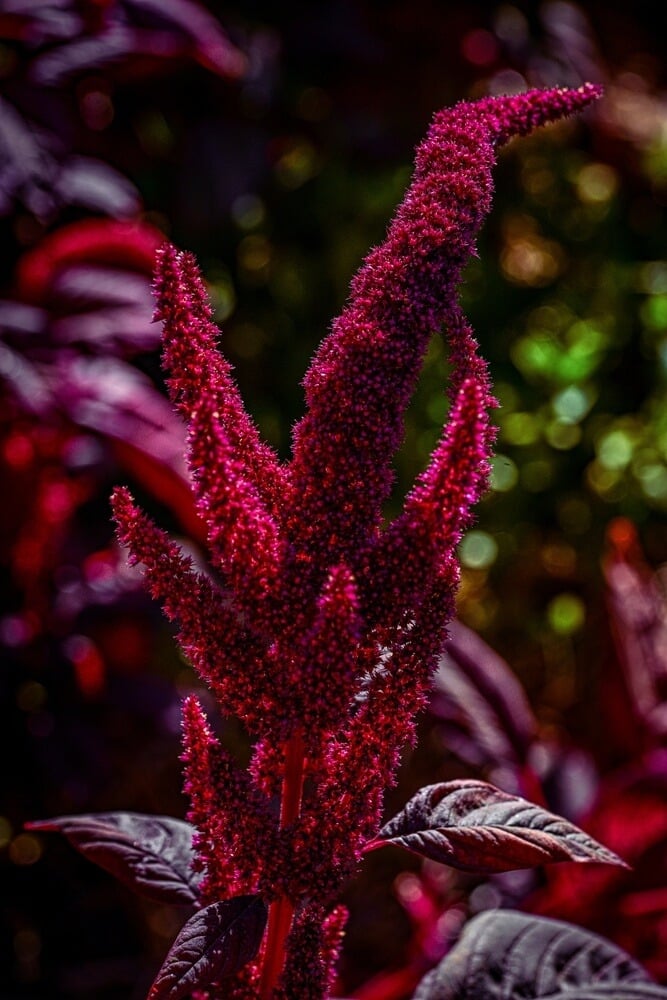
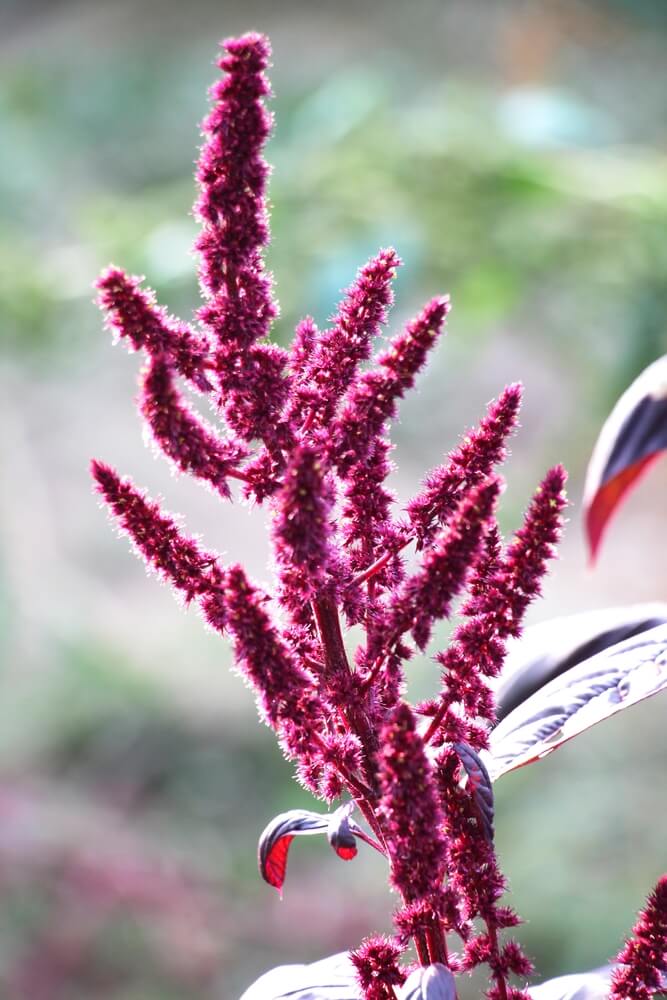
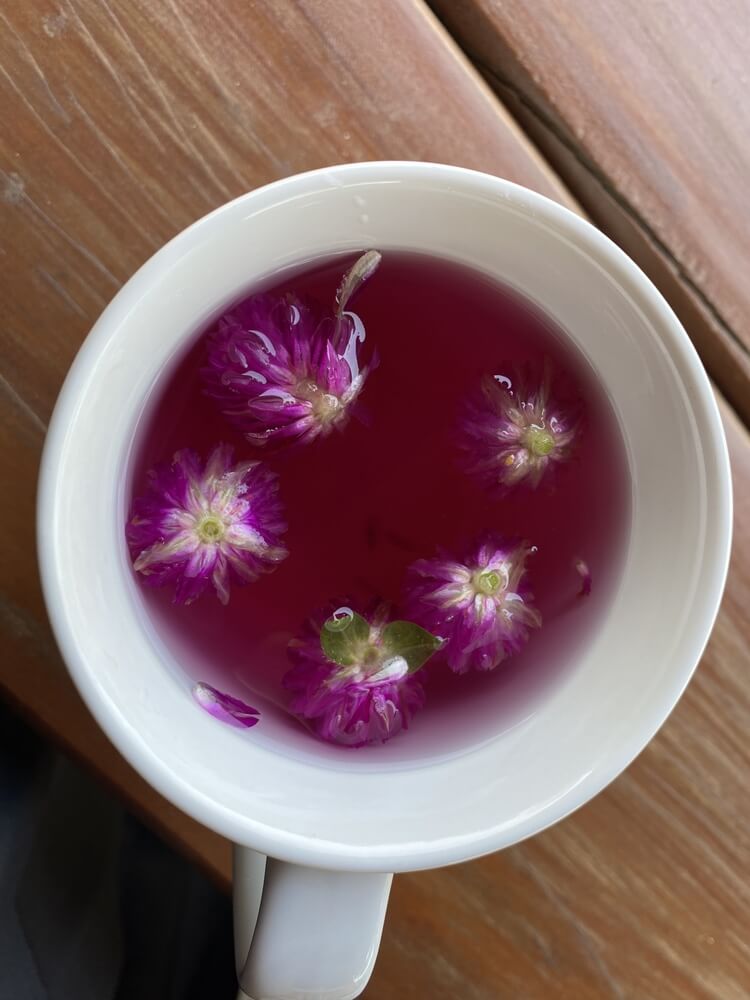
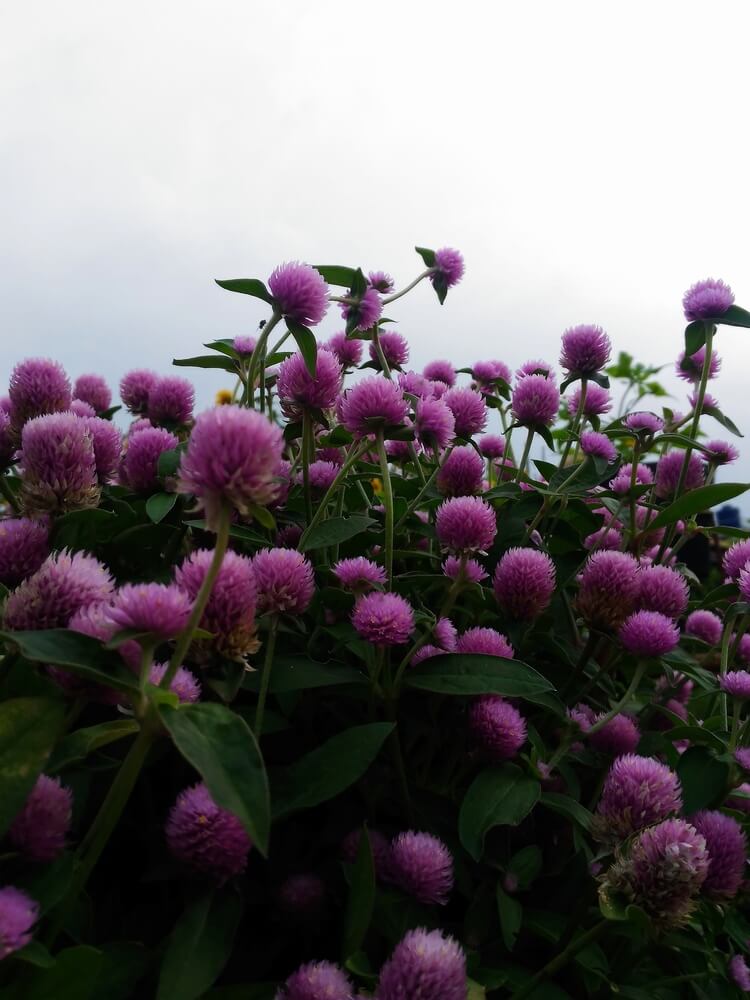
3. The Flower: “The Ornamental Edible.”
Even if you aren’t hungry, the striking crimson and gold flower plumes of amaranth are a gift to the homestead garden. A wide variety, like the famous ‘Love-Lies-Bleeding,’ is grown primarily for its dramatic, drooping tassels. These epic tassels can cascade several feet and nearly reach the ground.
These flowers are also completely edible! Use them to add a pop of vibrant color to salads or as an elegant garnish for desserts and cocktails.
Even after the growing season ends, those dried flower heads make spectacular additions to fall wreaths and dried arrangements, bringing the beauty of your summer garden indoors all winter long.
Read More – The 21 Best Food Forest Crops For Homesteaders And Small Gardens!
The Three Biggest Amaranth Growing Blunders – And How To Avoid Them
Even experienced gardeners run into trouble with amaranth. Usually, it’s because of these common mistakes that seem minor but can derail your entire crop.
1. The “Weed Look-Alike” Confusion
The biggest struggle with amaranth happens when the plants are just 2 to 3 inches tall, and it’s all about mistaken identity.
One of the most common garden weeds in North America is pigweed! Pigweed is actually a wild relative of cultivated amaranth. To an untrained eye, they look absolutely identical as seedlings. Same leaf shape. Same growth habit. Same everything.
The result is heartbreaking and happens more often than you’d think. Beginners accidentally pull up their expensive “Red Garnet” or heirloom amaranth while weeding. Or worse, they let the wild pigweed take over the garden. Months later, they realize something is wrong when it does not produce the expected flowers.
The easiest solution is to sow your amaranth in dead-straight rows or a specific pattern. (For instance, a circle or square.) If you see any rogue seedlings outside this designated area, assume it’s a weed.
2. Tiny Seeds vs. Heavy Soil (Damping Off)
The second major blunder involves those incredibly tiny seeds and getting them to germinate successfully.
Amaranth seeds are microscopic. Nearly 60,000 seeds can fit in a single ounce! Because the seeds are so small, they have very little stored energy.
Don’t bury them too deep! If you bury them more than 1/2 inch, they will likely rot before they germinate. Sowing amaranth seeds too early in the season can also kill them! These are phenomena called damping off.
The fix is easy. Just wait for the soil to get warm. And only dust the top layer of soil with seeds, then tap the seeds into the soil. (May and June work best in most regions.)
3. The Harvest “Window” And Birds
A new challenge emerges once those epic flower heads appear and start developing grain. Amaranth seeds don’t all ripen at the same time on the stalk. Some at the top might be ready, while others lower down are still immature.
If you wait for the whole head to look completely dry and perfect, the birds will have already raided your crop like it’s an all-you-can-eat buffet, because they absolutely love these high-protein seeds. Additionally, if a heavy rainstorm hits a fully ripe seed head, the seeds can shatter and drop to the ground, leaving you with nothing but a “volunteer forest” of amaranth sprouting everywhere the following spring.
The fix is learning to harvest at that sweet spot of about 75 percent ripeness. Use the “paper bag test” to know when you’re there.
When the flower heads look slightly dull and the color begins fading, bend one head carefully into a paper bag and give it a gentle shake. If seeds fall out relatively easily, it’s time to cut the whole stalk and bring it indoors.
Hang the amaranth seed heads upside down. Use a dry, well-ventilated space. You can also use a sheet or tarp beneath to catch the seeds as they finish drying. This way, you beat the birds, avoid weather damage, and still get a complete harvest as the remaining seeds mature off the plant.
Read More – The Ultimate Guide To Growing Hostas From Seed, Division, Or Transplant!
Conclusion
Amaranth is a little-known crop that earns its place on any homestead. You get a nutrient-dense grain that stores well. And an epic supply of yummy summertime greens. It’s also a superb ornamental plant with gorgeous, velvety flowers, making growing them even more rewarding.
Thanks for reading.
Have a great day!