
Pumpkin Growing Stages – Your Ultimate Guide to What to Do When
Welcome! This article contains affiliate links, meaning I get a commission if you decide to make a purchase through my links, at no extra cost to you.
Pumpkins are some of the best bumper crops of New England – known for producing an overflowing patch of deep orange gourds during the autumn harvest!
But, what are the pumpkin growing stages – and how do they relate to the pumpkin life cycle?
In this epic pumpkin growing guide, we’ll discuss the pumpkin plant stages in detail so you can reliably sprout, grow, and harvest pumpkins with confidence!
We’ll also share some of the most delicious pumpkin recipes, pumpkin storage tips, where to get the best pumpkin seeds – and more.
Pumpkin Life Cycle – Everything You Need to Know!

Let’s start by analyzing two parts of the pumpkin life cycle.
Pumpkin Life Cycle Components:
- Pumpkin Plant Stages
- Pumpkin Growing Stages
After growing pumpkins for years, I’ve also noticed a few pumpkin plant stage nuances that I’d love to share with you.
Let’s take a much closer look!
Related – How to Store Pumpkin Seeds for Planting Next Season! From Fruit to Vine!
Pumpkin Plant Stages
Before you plant pumpkins, you need to understand the pumpkin plant stages.
Luckily – pumpkins are tremendously easy to grow. And, I promise that studying their stages will make harvesting pumpkins even easier.
The pumpkin plant stages are as follows.
# 1 – Pumpkin Seed Germination

All pumpkin plants start here. The pumpkin seed germination stage!
But – before you germinate your pumpkin seeds, there are a few things you need to know.
Pumpkins are a warm-weather crop. They detest cold temperatures – anything below 50 degrees will slow your pumpkins!
Worst yet – frost will kill your pumpkins almost assuredly.
Pumpkins also come in a variety of sizes. We’ll talk more about pumpkin seed cultivars later in this guide.
For now – remember that your pumpkin seeds prefer temperatures between 65 degrees and 85 degrees for the best results!
That’s why you shouldn’t sow your pumpkin seeds outdoors until the last frost date for the season passes you.
Usually – people in the US plant pumpkin seeds sometime in late May or early June – but your results may vary. Consult your final frost date.
(If you live in a southern state, it’s easier to plant your pumpkin a little later without worrying too much about the frost.)
If you want to give your pumpkins a head start – you can also germinate pumpkin seeds indoors a couple of weeks before your final frost date.
I find that pumpkins germinate easily indoors using peat pots. Water your pumpkin plants with warm water once per night, and your pumpkin seeds will sprout within one week – for sure.
(Using warm water is my secret pumpkin germination trick. Warm water works like wonders! But, don’t make the water too hot. Just slightly above room temperature is perfect.)
If you decide to plant your pumpkin directly into your garden – then sow your pumpkin seeds roughly 1 inch deep in nutrient-rich soil. I would separate pumpkin seeds by at least two to three feet.
Remember that pumpkin plants love to explore – so give them room! I’ve had pumpkin vines stretch at least 15 or 20 feet long. Probably longer!

If you want to experiment with the pumpkin growing stages, then here's an excellent mixture of pumpkin seeds for you to try.
You get a brilliant variety of pumpkin cultivars, including Blue Jarrahdale, Jack O' Lantern, Cinderella, Connecticut Fields, Cumshaw Green Striped, Small Sugar, Fairytale, Atlantic Giant, and more!
Expect a harvesting time of around three to four months, or 90 days - 125 days. Perfect for new pumpkin gardeners!
# 2 – Pumpkin Seedlings

After watering your pumpkin seed for roughly one week, you’ll notice the next stage in the pumpkin plant stages, the pumpkin seedling!
As you observe your first baby pumpkin seedling, you’ll notice that the baby pumpkin plant looks thick, robust, and rugged compared to other seedlings you may have seen.
The good news is that I’ve never experienced leggy pumpkin plants when germinating indoors. The bad news is that they grow surprisingly fast.
It won’t be long before the pumpkin seedling’s roots are popping through the bottom of your peat pot!
You should expect to transplant your baby seedling outdoors within 1-2 weeks after germination.
(The more indoor sunlight you can offer your pumpkin seedling in the meantime, the better.)
Remember to mind your last frost date! Try to plan your pumpkin transplant after the first day of frost!
Related – 7 Creative and Fun Pumpkin Carving Ideas!
# 3 – Developing Pumpkin Plant

As your nurturing pumpkin plant matures and develops, you’ll notice a few things.
First, you’ll notice that your mature pumpkin plant grows a hardy canopy after weeks of development.
(You need to watch underneath your pumpkin leaves for pests! More on common pumpkin pests later in this guide.)
As you examine your mature pumpkin plant closer – you’ll also notice its tendrils! The tendrils are so cool!
The tendrils help the pumpkin vine defend against winds – and secure its place in your garden. (Otherwise, your pumpkins would be flopping and rolling all over the place.)
(That’s another reason to transplant pumpkins with at least 2 or 3 feet on each side – their tendrils will choke out your weaker flowers and veggies otherwise!)
You’ll also notice that your maturing pumpkin plant grows extraordinarily fast under the right temperature conditions.

If you're looking for a different pumpkin cultivar for adding variety to your garden, then look no further. These pumpkins are blue!
The majestic Blue Jarrahdale pumpkins will be some of the most unique that you've ever seen! They mature in around 100 days and weigh roughly 12 lbs - 18 lbs.
Pumpkin Growing Stages
You now know about the pumpkin plant stages and growth rate.
Now – let’s also analyze the pumpkin growing stages!
That way, you can identify the status of your pumpkin throughout their growing stages and harvest legendary pumpkins without second-guessing!
The pumpkin growing stages are as follows!
# 1 – The Pumpkin Flower

The first part of the pumpkin growing stages you need to know about is the development of pumpkin flowers.
Remember that all baby pumpkins start as pumpkin flowers!
Pumpkin flowers produce male flowers and female flowers. Like many plants in your garden – pumpkin plants make male flowers before making female flowers.
I find that usually, the male flowers show up before the female flowers by a couple of weeks.
As both the male and female pumpkin flowers begin to develop – your pumpkins need all the help they can get from friendly pollinators like honeybees!
(Your pumpkin flowers may fail to pollinate if you don’t have enough honeybees in your garden!)
Sometimes – during unusually wet seasons, your pumpkin flowers might fail to pollinate. Pumpkin plants and honeybees love moist weather – but not too wet!
In that case – if there are no honeybees, you’ll find that your pumpkin crop has many flowers but few pumpkins.
That’s another reason that I always say insecticides are the bane of gardeners everywhere. Do all you can to protect the honeybee populations!
How to Start and Run a Profitable Market Garden That Builds Health in Soil, Crops, and Communities
# 2 – Baby Pumpkin Development

If your female pumpkin flower pollinates successfully, a baby pumpkin will form.
The formation of your baby pumpkin is the most exciting part of the pumpkin growing stage. Your hard work is showing potential!
As your baby pumpkins begin to form – they need plenty of water, sunlight, and moderate temperatures.
Try to keep the pumpkin’s soil moist – but not soaked.
I’ve noticed that pumpkins perform tremendously well between 50 degrees and 85 degrees Fahrenheit.
But – if the temperature drops into the low 40s at night, your pumpkin crop will react poorly – and it likely won’t reach its full potential.
The same is true if the weather gets too dry and humid – I’ve noticed that if the temperature gets too hot (around 95 degrees), your pumpkins can shrivel – or fail to grow to their full mature size.
I’m sad to say that I’ve found several dried, shriveled-up pumpkins that unfortunately didn’t survive the intolerable heat spells.
# 3 – Mature Pumpkin Ready for Harvest!

You know your pumpkin’s ready for harvest when it’s a deep orange hue, and the skin feels hard.
Also, remember that not all pumpkins are necessarily orange. Your pumpkin may eventually turn a deep tan, blue, or red instead of deep orange.
Research your pumpkin cultivar so that you know how mature pumpkins appear.
As you harvest your pumpkin, make sure to protect your hands because some pumpkin vines have tiny thorns!
Get your favorite pair of gardening gloves and the sharpest pair of gardening scissors you have, and get to work!
Also, when you harvest your pumpkin – make sure to leave a few inches of stem above the pumpkin.
Otherwise, I find that the pumpkin skin may puncture when you harvest it from the vine. If you want your pumpkin to last until Halloween or Thanksgiving – a puncture will ruin your chances!
Pumpkins also look 100% cooler with a long stem! (Especially if you want to carve Jack-o-Lanterns!)

If you're seeking a baby pumpkin cultivar for your garden, then Small Sugar Pumpkins are the best!
Small Sugar Pumpkins are perfect as a decoration for your fall get-togethers. And they're also the ideal pumpkin for baking because of their sweet flavor.
They also make adorable mini Jack-o-Lanterns!
Related – How to Make Money Gardening – 12 Ways to Profit as a Small Backyard Farmer!
Pumpkin Growing Stages and Pumpkin Life Cycle FAQs!
I’ve been growing pumpkins and observing pumpkin plant stages for years.
I’m happy to answer many of the pumpkin growing questions my
I hope this helps!
Why Won’t My Pumpkin Flower Fertilize?
Weather and pollinators are the two huge factors.
When you see your pumpkin plant begin to form flowers, it’s almost time to celebrate. Those flowers represent your baby pumpkins!
But – if your homestead doesn’t have many honeybees – then you may be in for a long wait.
Usually – a honeybee must carry the pollen from a male pumpkin flower to a female pumpkin flower for successful pollination.
If you’re using artificial pesticides around your garden veggies, I urge you to stop! Your garden needs more pollinators, honeybees, and ladybugs. Not less!
This premium pack of 80,000 wildflower seeds can help allure honeybees and other beneficial insects like ladybugs and butterflies.
You get pure, non-GMO seeds such as Cosmos, New England Aster, Butterfly Milkweed, Purple Coneflower, Red Corn Poppy, Sweet Alyssum, and tons more!

How Do I Properly Store Pumpkins?
Storing your pumpkin after you’ve aced the pumpkin growing stages is a piece of cake.
The main idea is to keep your pumpkin cool and dry.
I try to seek around 60% humidity and 60 degrees Fahrenheit for long-term storage.
But – you don’t have to be that precise.
If you have an old wooden table, a countertop – or any cool and dry surface – it’s the perfect spot to store your pumpkins.
I’ve had pumpkins last for several months without issue.
Whatever you do – don’t park your pumpkin in direct sunlight when storing long-term.
Also – once you puncture or carve the pumpkin – its lifespan starts ticking much quicker!
Expect your carved Jack-o-Lantern to maintain its perfect form for a week or so, if you’re lucky.
Is the Pumpkin Lifecycle Shorter In New England?
Potentially, yes! (But, not really!)
Here’s what I mean.
The first overnight frost may occur in the northern parts of the USA in as early as mid-September.
Remember that many pumpkin cultivars require at least 100 days to reach maturity. Some take even longer.
Plan accordingly!
(That’s another reason I love to germinate pumpkins indoors. Give your pumpkins a head start!)
Also, consider our recommended planting schedule for pumpkin crops – regardless of the pumpkin life cycle.
Pumpkin Growing Timetable:
- Northern States – Plant around late May or early June
- Southern States – Plant around May/June/July
In southern states – you have more flexibility when to grow your pumpkin crop because the first frost date is usually later in the year.
If you live in a northern state with an early frost date – you have more of a time crunch! Plant soon after your final frost date so your pumpkin has time to mature.
Also consider the first frost date on the other side of summer, too! Hopefully, the pumpkins get to mature before the first frost smashes your crop.

224 Pages of pumpkin delight! This book teaches you how to grow more than 95 varieties of pumpkins and includes recipes for pumpkin pies, muffins, beer, and more. The ultimate resource for growing your own giant pumpkins!
How Do I Grow Large Pumpkins? Why Are My Pumpkins Small?
Offer your pumpkin plenty of warmth, sunlight, and water! Also – consider the genetics of your pumpkin.
Pumpkin breeds come in different sizes – try experimenting with one of the larger pumpkin cultivars!
Large Pumpkin Cultivars:
- Prizewinner
- Monster Smash
- Atlantic Giant
- Big Max (My favorite!)
Massive pumpkins usually take longer to mature compared to tinier pumpkins.
Some large pumpkin cultivars can take at least 125 – 140 days to mature. Some require even longer!
Related – Our Guide for Growing and Harvesting Spaghetti Squash Confidently!
Will Weeds Kill Pumpkin Plants?

I find that pumpkin plants can outperform most garden weeds. Pumpkin plants are especially tough when your pumpkin vine develops a tall canopy!
(Then, the pumpkin leaves soak in as much oxygen and sunlight as they can manage and outperform smaller weeds.)
Sometimes I’ll even spot an unidentified plant in my garden – only to discover weeks or months later that it’s a pumpkin – or gourd variety. There’s nothing better than bonus pumpkins!
(The point is that pumpkins are resilient. And, dropped seeds have no problem germinating on their own!)
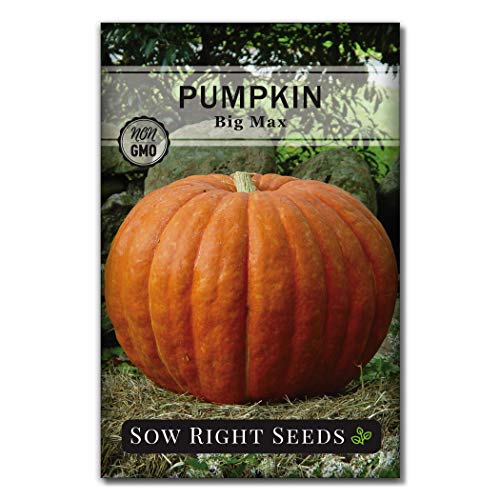
Do you want a heavy-hitting pumpkin cultivar for your garden? Then it's tough to beat the size and beauty of the Big Max Pumpkin!
Big Max Pumpkins reach up to 100 pounds - or more! And they're beautiful whether you turn them into a Jack-o-Lantern or not.
Big Max Pumpkins are also versatile for cooking - they make excellent bread, soups, and pies. Expect your Big Max Pumpkins to mature in around 110 days.
I Have Stink Bug Looking Creatures on My Pumpkin Plant?
If you find a gray bug that resembles a stink bug on or around your pumpkin plants, then I have bad news.
I’m afraid those gray monsters on your pumpkin leaves aren’t ordinary stink bugs. No. You probably have squash bugs!
Once you identify squash bugs on your pumpkin harvest, don’t panic or rush to artificial pesticides.
Instead, begin manually plucking the insects and tossing them into a jug of water.
As you examine your pumpkin crop for more squash bugs, look out for their frightful red eggs!
My Pumpkin Leaves Have Red Insect Eggs on Them! Help!
The red eggs you see likely belong to either squash bugs or vine borers. Both bugs are the sworn enemies of pumpkin plants everywhere!
Luckily, getting rid of these unsightly pumpkin pests is much easier than you think.
I spend hours every summer diligently scanning for red eggs under the leaves of my pumpkins, zucchini, and squash plants.
Once I spot them, I gently scrape (or slice) the infected section of the leaf and then drop the leaf in a bottle of water.
(I add a small dash of all-natural dish soap into the bottle to help eliminate the squash bug eggs and any Japanese beetles I happen upon during my quest.)
Also, watch out for these infamous pumpkin pests!
Pumpkin Pests:
- Spider Mites
- Cucumber Beetles
- Squash Bugs
- Vine Borers
The best defense against any of these pests is manual observation and removal. Avoid using harsh pesticides – especially the artificial variety.
Does Cold Weather Alter the Pumpkin Life Cycle?
Yes! The cold temperature will freeze your pumpkin’s growth to a halt!
Pumpkins have a reputation as a fall weather crop. But – they don’t like the frost!
I’ve seen frostbitten pumpkins with my own eyes – frost kills them overnight.
Here’s a trick New Englanders use if we transplant our pumpkins too early and a sudden frost hits.
Cover your baby pumpkin plants with a bucket or pot! That will stop frost from killing your pumpkin plant.
It’s a temporary solution – but helps the pumpkin seedling fight another day. Hopefully, warm weather is right around the corner.
My Pumpkin Vine is Dying! What Do I Do?
During the later part of the pumpkin growing stages – you may find that the pumpkin vine begins to decay.
If you notice vine decay – it’s not the end of your pumpkins. I’ve damaged plenty of pumpkin vines in my time.
Sometimes, it’s easy to inadvertently step on them, crush the vines, or even whack them with the lawnmower inadvertently.
(Because the pumpkin vines stretch everywhere – especially late in the season!)
Other times, disease or pests have successfully attacked your pumpkin crop – and your vine is now dying.
If you notice the vine is rotting or dying – one option you have is to harvest the pumpkin a little prematurely.
If it’s late in the season – your pumpkin may already be ready for harvest.
Is the pumpkin dark orange, and is the skin slightly hardened? If so – then consider salvaging your crop!
I’ve also noticed that pumpkin vines are surprisingly fragile. Be careful not to hurt the vines – or step on them!
Best Pumpkin Recipes for After the Harvest!

The best pumpkin growing stage occurs after the harvest – around the time you get to eat your pumpkins with your friends and family over a fulfilling holiday meal!
That’s why we’re helping celebrate by sharing some of the best pumpkin recipes we could find.
Perfect for your pumpkin harvest – no more leftover pumpkins!
Best Pumpkin Recipes:
- Pumpkin nut bars
- Pumpkin pie recipe (no baking!)
- Pumpkin pie ice cream
- Pumpkin pancakes
- Creamy pumpkin soup
- Whole wheat pumpkin pancakes
- Mini oatmeal pumpkin spice muffins
- Savory pumpkin soup
- Pumpkin yogurt spice
- Pumpkin grits
- Pumpkin sweet potato soup
- Spiced pumpkin shake
- Chickpea pumpkin curry
I also want to save my favorite pumpkin recipe for last so you can get the most from your pumpkin life cycle – and harvest!
I’m talking about pumpkin granola bars! Perfect if you want a sweet and savory snack that provides plenty of energy.
Happy harvests!
Pumpkin Growing Stages and My Final Pumpkin Growing Tip!
Here’s my favorite tip for the final pumpkin growing stages that can help you leading up to the harvest.
During the mature pumpkin growing stage – I always carefully monitor the undersides of the pumpkin.
Look out for pests, pest eggs, excess moisture, and – most critically – pumpkin bruises!
Sometimes, if moisture gets too severe and there’s no drainage – I’ve seen pumpkins rot from the underside!
I’ve salvaged a few pumpkins by placing dry cardboard underneath them during a spell of moist, humid weather that otherwise caused many of my pumpkins to rot.
(The freshly laid dry cardboard helped to keep the pumpkins dry. It worked! Dry hay can also provide excellent drainage for your pumpkin patch.)
The idea of salvaging soggy pumpkins goes back to the idea that pumpkins, throughout all growing stages, love moist – but not soaking wet soil.
Thanks for reading this pumpkin life cycles guide!
Hopefully, you now love pumpkins as much as I do – maybe more.
Thanks again for reading.
You rock!
Continue Reading:
- 13 Strange Fruits and Veggies You Have to See to Believe!
- How Many Pumpkins Per Plant to Get the Best Yield?
- How to Choose the Best Fertilizer for Vegetable Gardens (Including Our Top 9 Picks!)
- The Ultimate Ruth Stout Method Guide for No-Work Gardening + Organic Food
- How to Stop Insects Eating Plant Leaves: Top Natural Insect Repellents Revealed
- 31 Simple Halloween BBQ Party Ideas [Plus Tips for Decorations and Spooky Games]


Hi! Beginner gardener here. I was so excited my pumpkins were growing. Then a rabbit came and ate all the leaves and left stem. Are they done or can I salvage them. They hadn’t even flowered yet.
Hi Debora!
Oh no! That’s such a shame 🙁
Unfortunately, in my experience, pumpkins aren’t particularly resilient. I would certainly leave them for a while to see if they do pop back up, but be prepared that they may not. Are there any leaves left at all or did they completely eat it down to just a small bit of stem? Keep us updated!